How To Test Power Window Switch With Multimeter?
Publish Time: Author: Site Editor Visit: 1604
Testing a power window switch with a multimeter involves checking for both voltage (to ensure power is reaching the switch) and continuity (to ensure the switch is functioning correctly when activated). Here's a step-by-step guide:
Safety Precautions
- Make sure the car is off and the key is removed from the ignition.
- For added safety, you may disconnect the battery, but this is not always necessary for testing the switch.
Accessing the Switch
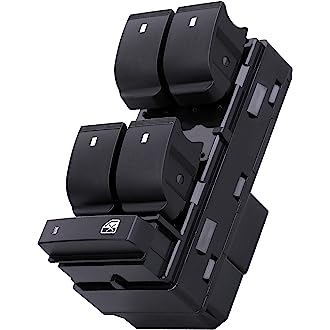
- Remove the switch from the door panel or center console. This usually requires prying off the switch panel or unscrewing it.
Setting Up the Multimeter
-
Voltage Test:
- Set your multimeter to measure DC voltage (often denoted as "V-" or "DCV" on the dial).
- Locate the power and ground terminals on the back of the switch. Your vehicle’s service manual can help identify these.
-
Checking for Power:
- Connect the multimeter's negative lead to a good ground point (metal part of the car's frame or chassis).
- Touch the positive lead to the power terminal of the switch.
- Turn the ignition key to the "on" position without starting the engine.
- If the multimeter shows voltage (usually around 12V), power is reaching the switch. If not, there may be an issue with the power supply (like a blown fuse or broken wire).
Continuity Test
-
Switch to Continuity Mode:
- Set your multimeter to the continuity setting (usually denoted by a diode symbol or the word "CONT").
- Continuity mode will check if the circuit is complete when the switch is activated.
-
Testing the Switch:
- With the switch disconnected from the power supply, place one multimeter lead on one terminal of the switch and the other lead on another terminal.
- Activate the switch (either the 'up' or 'down' position, depending on your testing).
- A functioning switch will complete the circuit, and the multimeter will beep or show a low resistance value (close to zero).
- Repeat this for each function of the switch (up and down for each window controlled by the switch).
Analyzing Results
- Voltage Test: If there's no voltage at the switch, the issue could be upstream (like a blown fuse or wiring issue).
- Continuity Test: If the multimeter does not indicate continuity when the switch is activated, the switch is likely faulty.
Reassembly
- Once testing is complete, reassemble everything in reverse order.
Additional Considerations
- If you're unfamiliar with using a multimeter or handling vehicle electrical systems, it's advisable to consult with a professional.
- The testing process might slightly vary depending on your vehicle's make and model. Always refer to the vehicle’s service manual for specific instructions.
This is a general guideline and should be adapted to your specific vehicle and switch configuration.


